
Collect contacts from Mailchimp
Learn how to collect contacts from Mailchimp.
 View as Markdown
Krenalis allows you to collect user data directly from your Mailchimp account, map it seamlessly into the Customer Model schema, and load it into your data warehouse for a unified, consistent view of your customers.
How it works
- Choose where to sync. Select the Mailchimp audience to read from.
- Select your contacts. Choose which contacts to include.
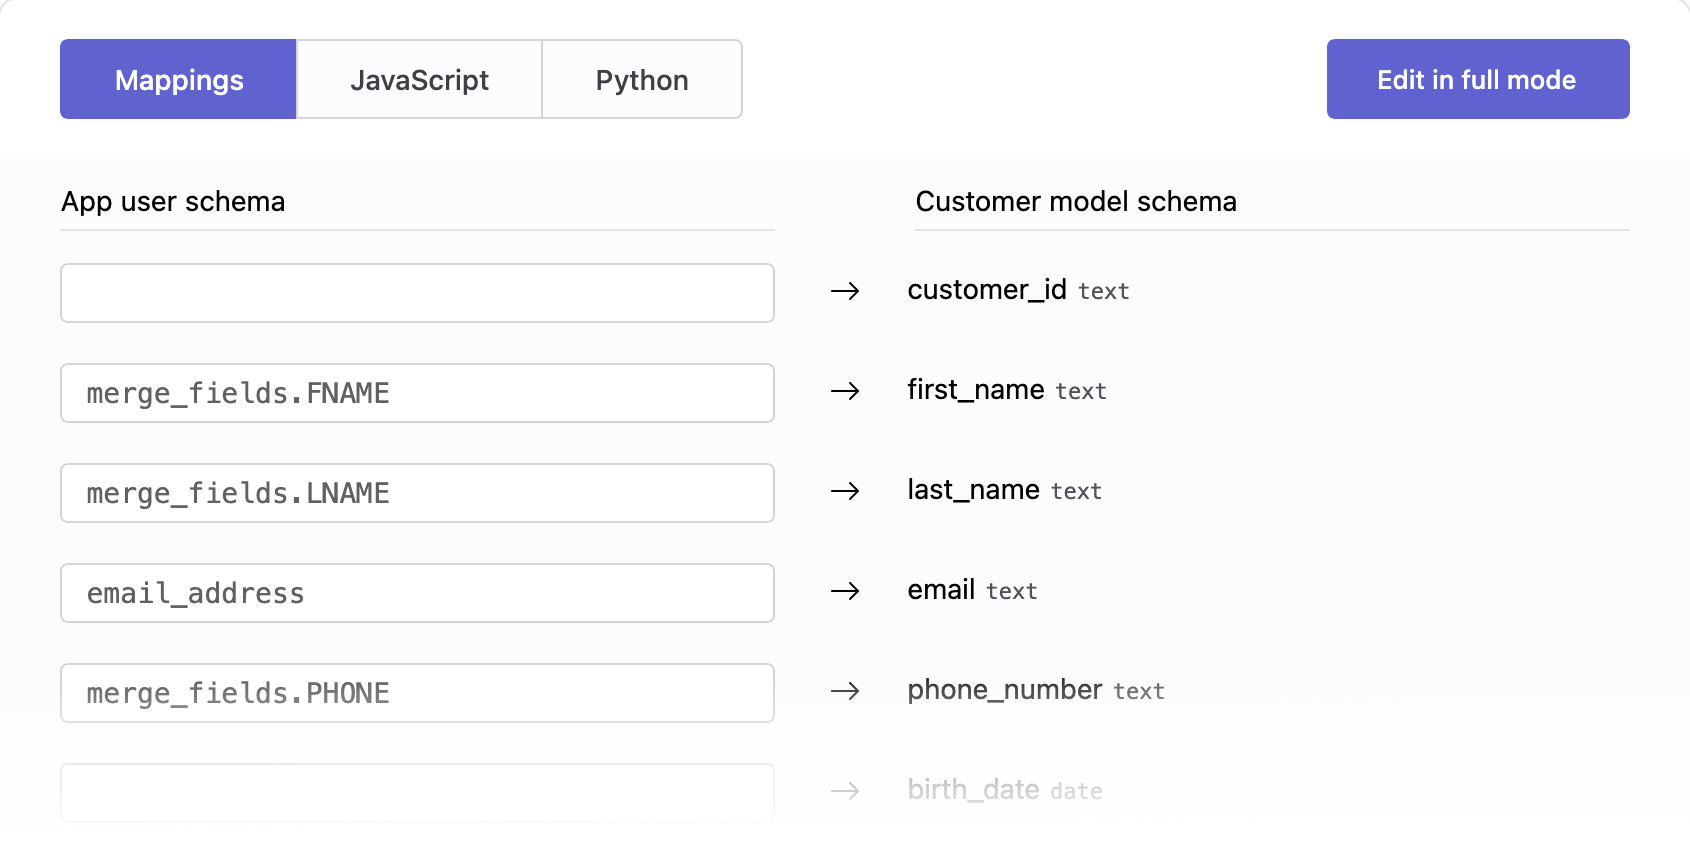
- Map the data. Match each Mailchimp property to your Customer Model using Visual Mapping, JavaScript, or Python.
- Set the schedule. Choose how often Krenalis synchronizes contacts.
- Keep it fresh. Krenalis automatically updates your users in the workspace's data warehouse, adding or updating users when new contacts appear.
Steps
Follow these steps in the Krenalis Admin console to connect Mailchimp and set up user imports.
1. Generate the Mailchimp API key
- Log in to your Mailchimp account.
- Click the round account button in the top-right corner.
- In the menu, select Account & billing.
- Click Extras.
- Click API keys.
- Under Your API keys, click Create A Key.
- Enter an API Key Name (for example, "Krenalis").
- Click Generate Key.
- Copy the key displayed on screen.
2. Connect Krenalis with Mailchimp
- In your Krenalis workspace, open the Destinations page.
- Click Add a new destination ⊕, then select the Mailchimp card.
- Click Add destination....
- (Optional) In Name, enter a label to identify the connection later.
- Paste the API key you copied earlier.
- Click Next
- From the Audience menu, select the Mailchimp audience to which write and click Add to complete the connection.
3. Add a pipeline to import contacts
In the new connection for Mailchimp, click Add pipeline... next to the Import Mailchimp contacts pipeline.

Each pipeline tells Krenalis which data to read and how to structure it in Krenalis. You can define multiple pipelines per source to manage different datasets.
4. Filter contacts
If you don't want to read all contacts from Mailchimp, use filters to select which contacts to sync. Only contacts that match the filter conditions will be synced. If no filters are set, all contacts will be imported. For more information on how to use filters, see the Filters documentation.

5. Enable incremental import
By default, each import processes all contacts from your Mailchimp account. You can enable Run incremental import to update only contacts that have changed since the last sync. This option can help reduce processing time and API usage while keeping your data up to date.

6. Transformation
Use the Transformation section to decide how contact data is written into Customer Model properties. You can visually map properties from Mailchimp to the Customer Model, or use JavaScript and Python for more advanced logic (for example, formatting dates or combining multiple properties).
7. Save your changes
When everything looks good, click Add (or Save if you're editing an existing pipeline).
To import another set of contacts from the same Mailchimp audience, repeat the process starting with the Add a pipeline to import contacts step.
Pipelines
Once saved, the new pipeline appears in the pipelines list for Mailchimp. From here, you can monitor imports, adjust filters, and manage transformations. Each pipeline defines how and when users flow from Mailchimp into your warehouse.
With a single Mailchimp connection, you can create multiple import pipelines to sync different data segments within the same account.

| Column | Description |
|---|---|
| Pipeline | Name and description of the pipeline. |
| Filters | Conditions used to select which contacts are imported. If not set, all contacts are imported. |
| Enable | Switch to activate or deactivate the pipeline. When disabled, the pipeline will not run, even if a schedule is defined. |
| Run now | Run the import immediately, one time only. Available only when the pipeline is enabled. |
| Schedule | Frequency of automatic imports. You can also run the import manually at any time. |
| Manage | Edit settings such as filter, incremental imports, and transformation |
| ⋮ (More) | Additional options, such as deleting the pipeline. |