
Ingest users from databases
Learn how to ingest users from databases.
 View as Markdown
Krenalis makes it easy to collect user data directly from your databases by writing your own queries, map it seamlessly into the Customer Model schema, and load it into your data warehouse for a unified, consistent view of your customers.
Krenalis currently supports reading user data from PostgreSQL, MySQL, ClickHouse, and Snowflake.
Steps
1. Connect a database
- Go to the Sources page of your Krenalis workspace.
- Click on Add a new source ⊕ and click on the card corresponding to your database.
- Click on Add source....
Enter the connection details for the database. The specified database name and schema define the default context for queries but do not restrict access to other databases or schemas the user is authorized to reference. It is recommended to use a read-only user account, ideally limited to the databases and tables you want to be accessible in queries.
PostgreSQL
| Field | Description |
|---|---|
| Host | Hostname or IP address of the database. |
| Port | Port used to connect (default is 5432). |
| Username | Username for authentication. |
| Password | Password associated with the username. |
| Database name | Name of the database. |
| Schema | Name of the schema within the database. |
MySQL
| Field | Description |
|---|---|
| Host | Hostname or IP address of the database. |
| Port | Port used to connect (default is 3306). |
| Username | Username for authentication. |
| Password | Password associated with the username. |
| Database name | Name of the database. |
ClickHouse
| Field | Description |
|---|---|
| Host | Hostname or IP address of the database. |
| Port | Port of the native ClickHouse protocol. (9000 default; 9440 with TLS). |
| Username | Username for authentication. |
| Password | Password associated with the username. |
| Database name | Name of the database. |
Snowflake
| Field | Description |
|---|---|
| Account Identifier | Account ID of the Snowflake warehouse in the form <orgname>-<account>. |
| User Name | Username used to authenticate with Snowflake. |
| Password | Password associated with the provided user name. |
| Role | Role that will be used for accessing the data in Snowflake. |
| Database | Name of the database. |
| Schema | Name of the schema within the database. |
| Warehouse | Name of the virtual warehouse to execute the query. |
Before clicking Add, you can test the connection by clicking Test connection. The connection you just created is a source connection. You can access it later by clicking Sources section in the sidebar.
2. Add a pipeline to import user data
In the connection for PostgreSQL, next to the Import users pipeline, click Add pipeline....

3. Query
Enter the query to run on your database to return the user data to import.
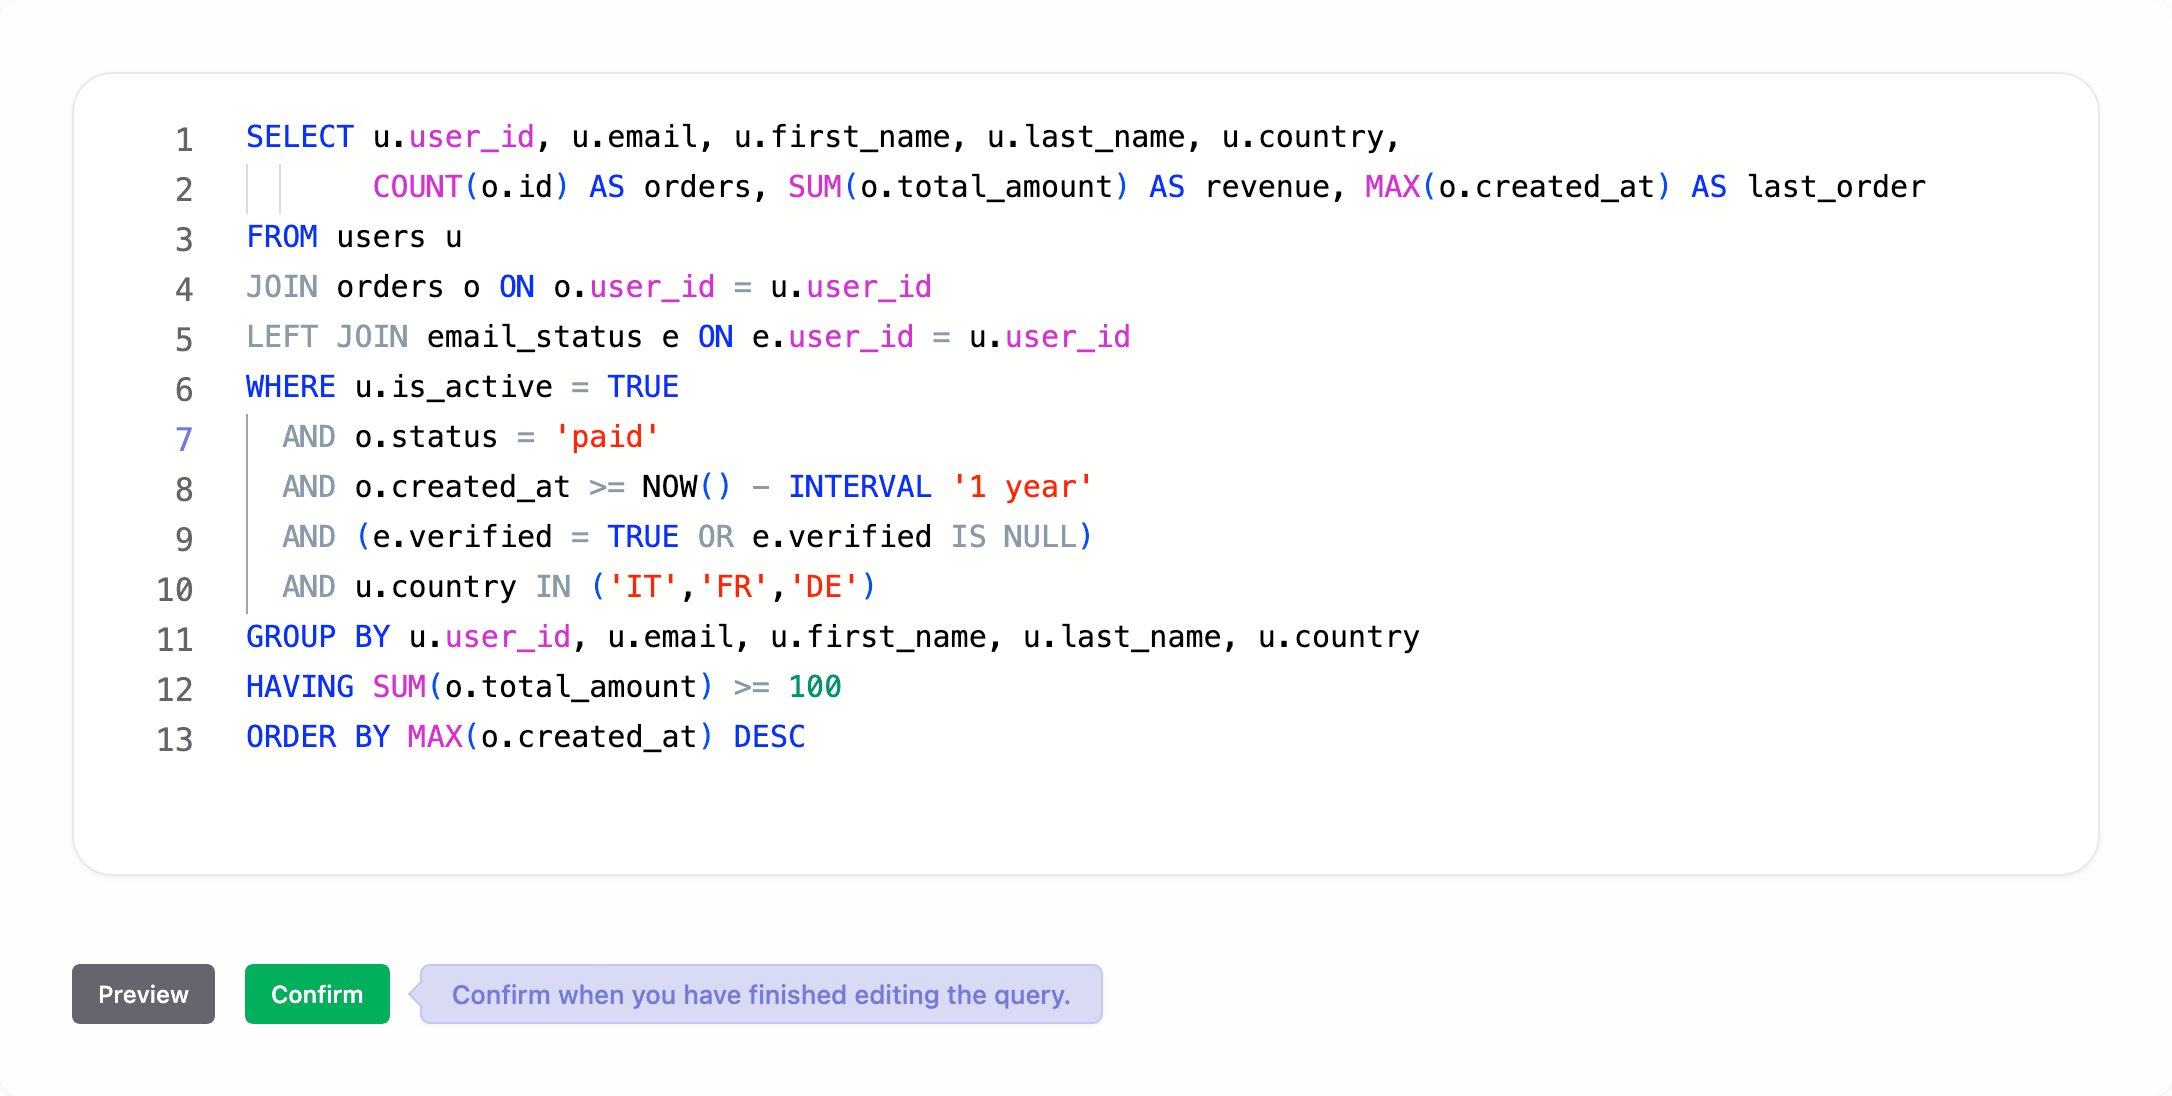
Click Preview to show a preview of the query with the first rows.
Click Confirm when you're satisfied with the query. You can still modify it later if needed.
4. Identity column
Select the column that uniquely identify a user in the result rows and, if available, the column containing the user's last updated date. This step ensures that only unique users are imported and incremental updates work correctly.
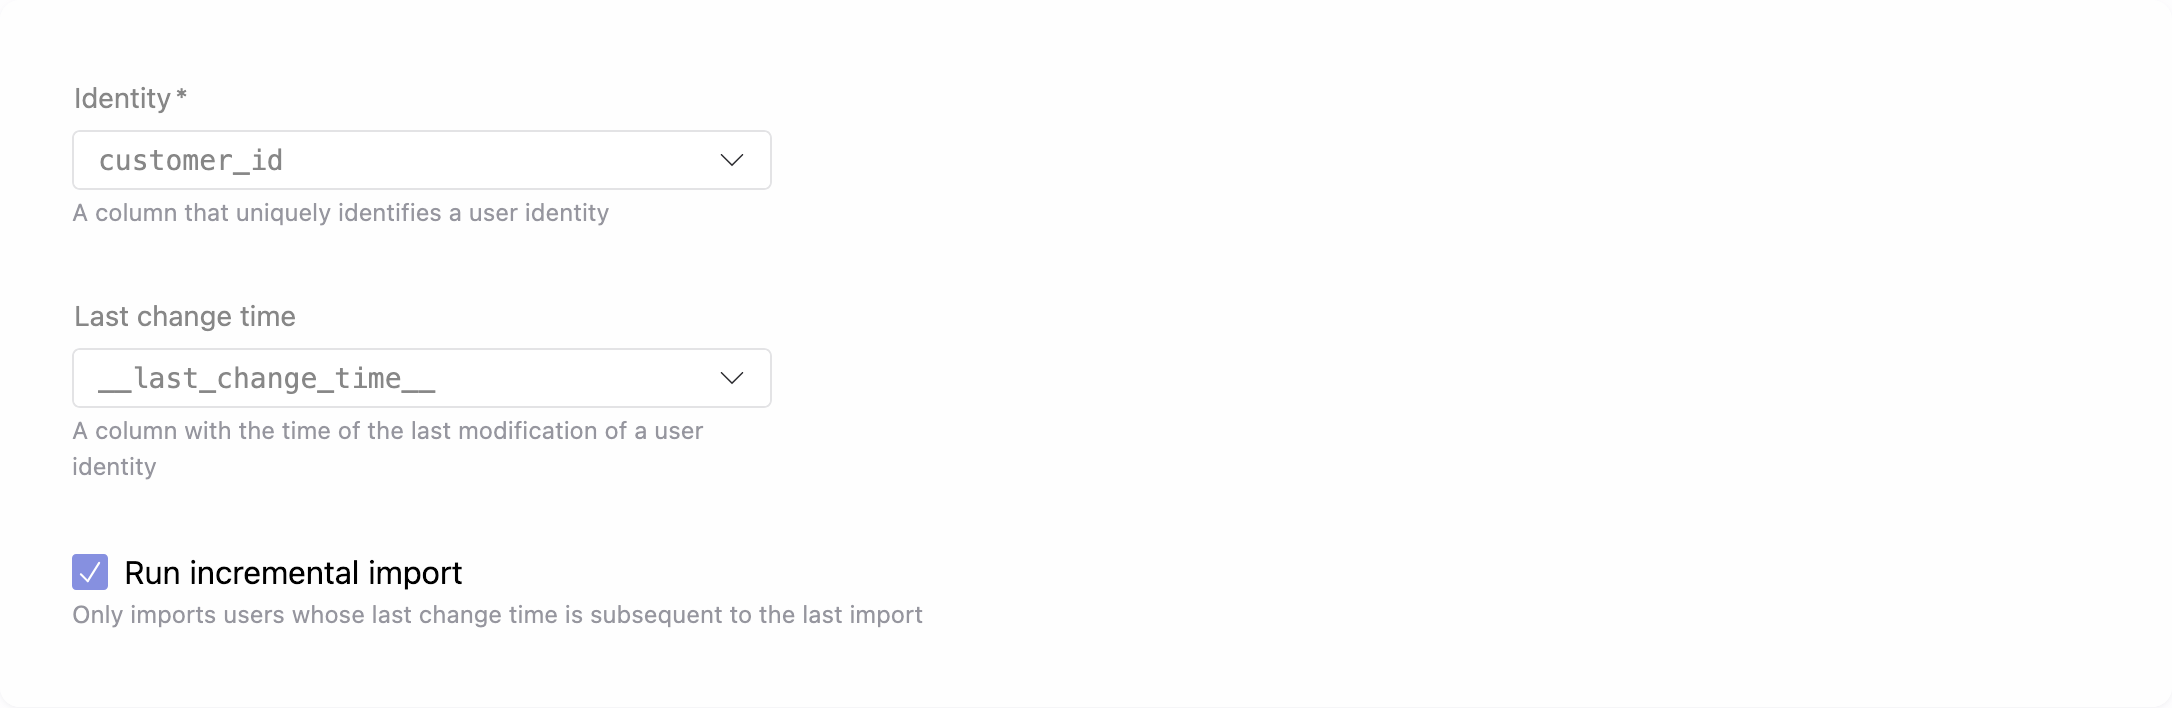
Select Run incremental import if you want subsequent imports to include only the rows updated after the last import.
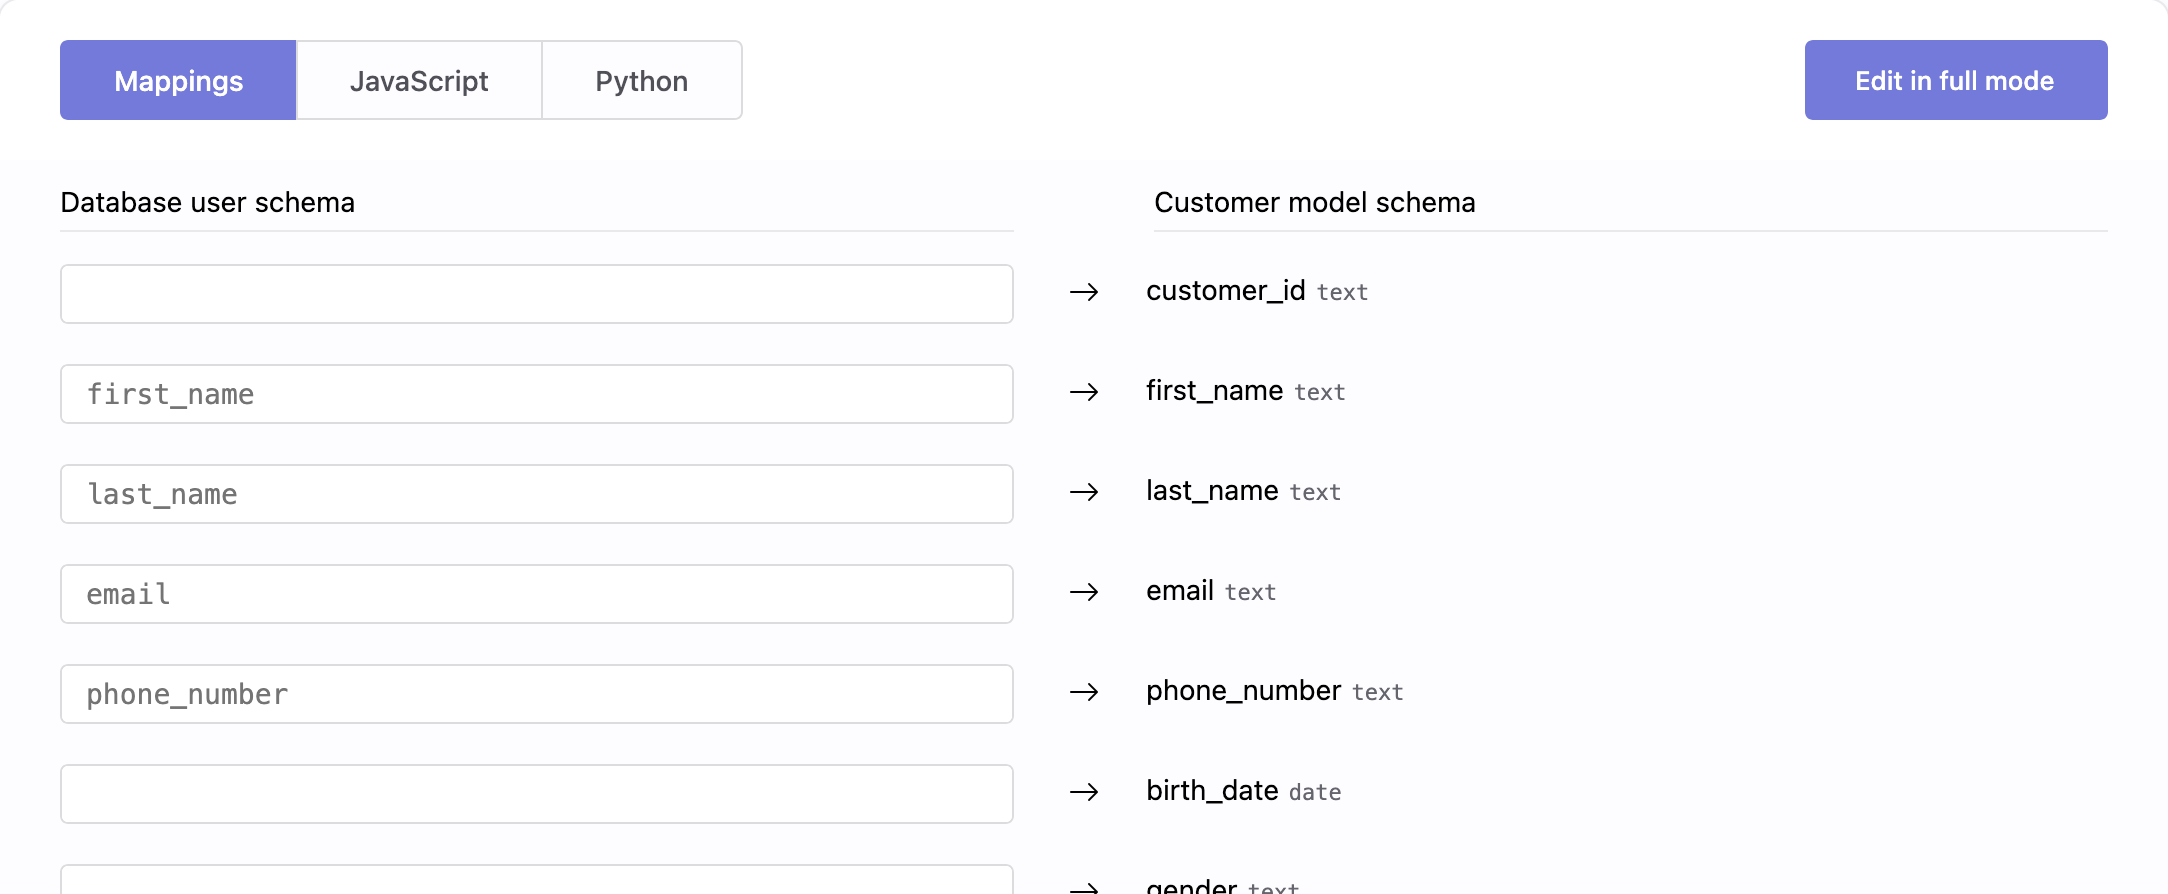
5. Transformation
The Transformation section allows you to harmonize the query schema with your Customer Model schema. You can choose between Visual Mapping or advanced transformations using JavaScript or Python.
Its purpose is to assign values retrieved from the query execution to the properties of the Customer Model. You have full control over which properties to map, assigning only those that matter to your business context while leaving others unassigned when no corresponding values exist.
For complete details on how transformations work for harmonization, see how to harmonize data.
6. Save your changes
When you're done, click Add (or Save if you're editing an existing pipeline).
For a single connection, you can also create multiple pipelines that import different user sets from the same database.
Pipelines
Once saved, the new pipeline appears in the pipelines list for PostgreSQL. From here, you can monitor imports, adjust filters, and manage transformations. Each pipeline defines how and when users flow from PostgreSQL into your warehouse.
With a single PostgreSQL connection, you can create multiple import pipelines to sync different datasets from the same database.

| Column | Description |
|---|---|
| Pipeline | Name and description of the pipeline. |
| Enable | Switch to activate or deactivate the pipeline. When disabled, the pipeline will not run, even if a schedule is defined. |
| Run now | Run the import immediately, one time only. Available only when the pipeline is enabled. |
| Schedule | Frequency of automatic imports. You can also run the import manually at any time. |
| Manage | Edit settings such as query, identity column, and transformation |
| ⋮ (More) | Additional options, such as deleting the pipeline. |