
Activate events in PostHog
Learn how to send events in real time to PostHog.
 View as Markdown
Before you begin
Before proceeding, make sure you have already configured at least one event source in Krenalis. Posthog activation requires an existing source, since events must originate from a connected source before they can be routed to this destination.
Steps
1. Get your PostHog Project API key and cloud region
To start, you'll need the Project API key of the PostHog project you want to link.
Choose one of the options below:
- Log in to PostHog and select the project you want to connect to Krenalis.
- Go to ⚙ Settings → Project → General → Project ID.
- From Project API key section, copy the key and, if you are using PostHog Cloud, take note of the Project region.
2. Connect Krenalis with PostHog
Next, connect Krenalis to your PostHog project.
- In your Krenalis workspace, open the Destinations page.
- Click Add a new destination ⊕, then select the PostHog card.
- Click Add destination....
- (Optional) In Name, enter a label to identify the connection later.
- Fill in the Project API key with the key previously copied.
- Select Cloud or Self-hosted based on the PostHog deployment you are using:
- Cloud: select the project region.
- Self-hosted: enter the URL of your PostHog instance (for example, https://example.com).
- Click Add.
3. Link an event source
Events received from an event source are delivered to Posthog in real time. Click Link event source… and select one or more sources to define where events should originate from.
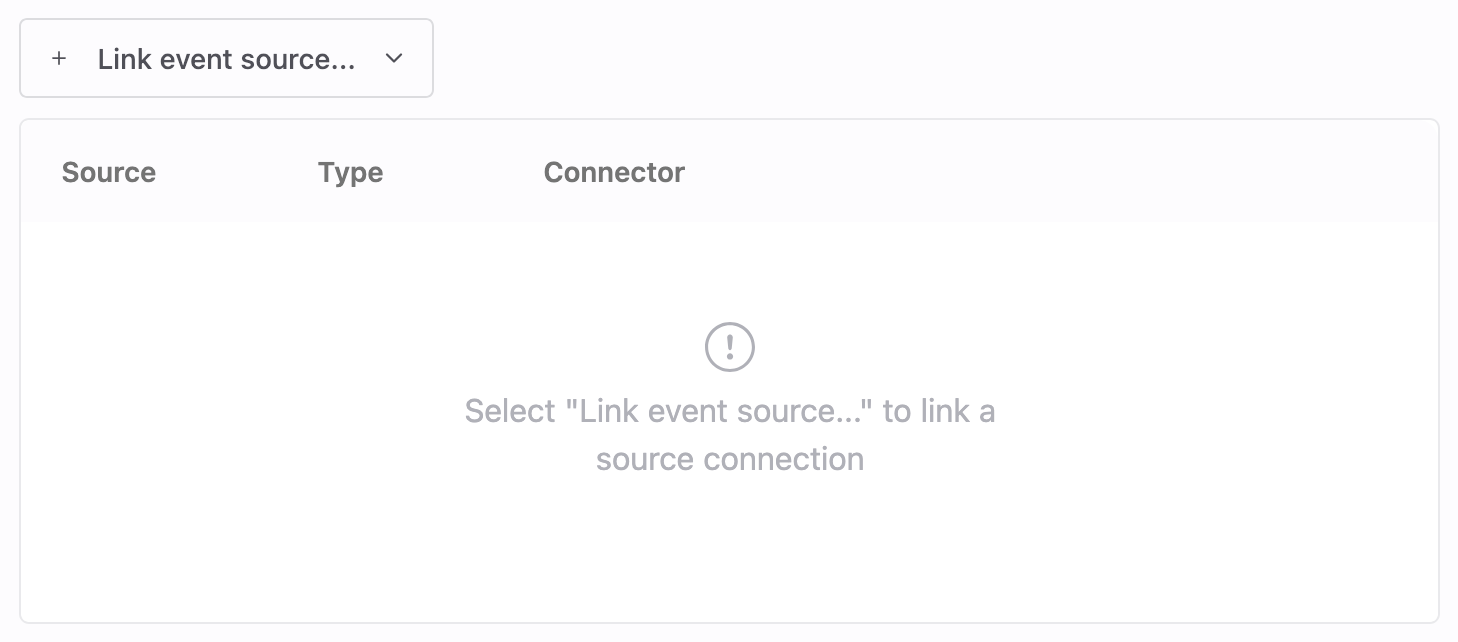
If no event sources are available, you can continue with the setup and link a source later. Keep in mind that event delivery cannot be tested until at least one source is connected.
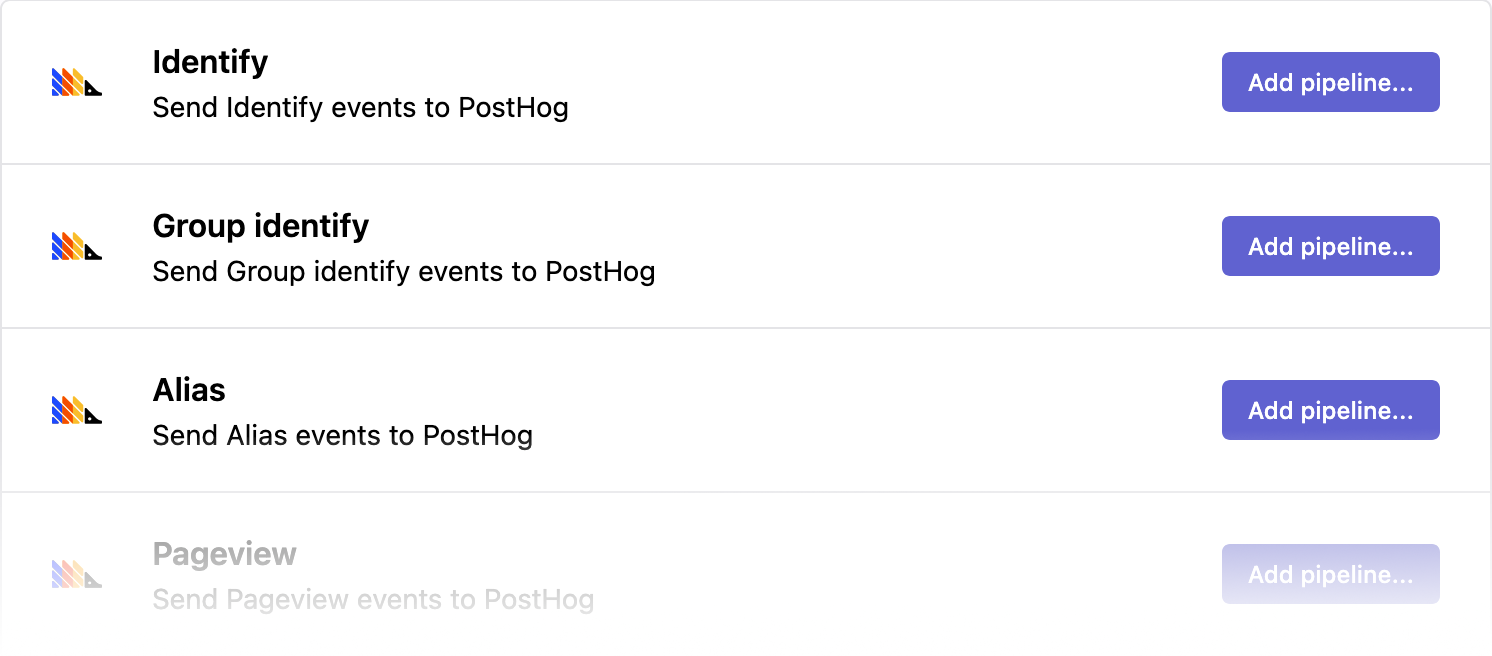
4. Define a pipeline for each event
Krenalis lets you send different types of events to PostHog by creating a dedicated pipeline for each one.
Each pipeline specifies how a particular event is delivered — for example, a "Purchase Completed" event or an "Order Shipped" event.
Select an event from the list and click Add pipeline… to link it with PostHog.
To configure more events, click Add new pipeline ⊕ and select another event from the list.
Repeat this process to define all the events you want to send to PostHog.
5. Set event conditions
Based on the event selected in the previous step, set a filter that defines the conditions the incoming event must meet. Filters let you control exactly when an event should be sent to PostHog — for example, only when specific event properties or user conditions occur.

For example, the filter above can be used to send an "Order Completed" event. In this case, Krenalis sends the event only when both conditions are true: the event type is track and the event name is Order Completed. This ensures that only relevant events are sent to PostHog, avoiding duplicates and keeping your analytics data clean.
6. Set event parameters
In this step, you decide which event data is sent to PostHog and how it appears there.
Use this section to map event properties to PostHog parameters.
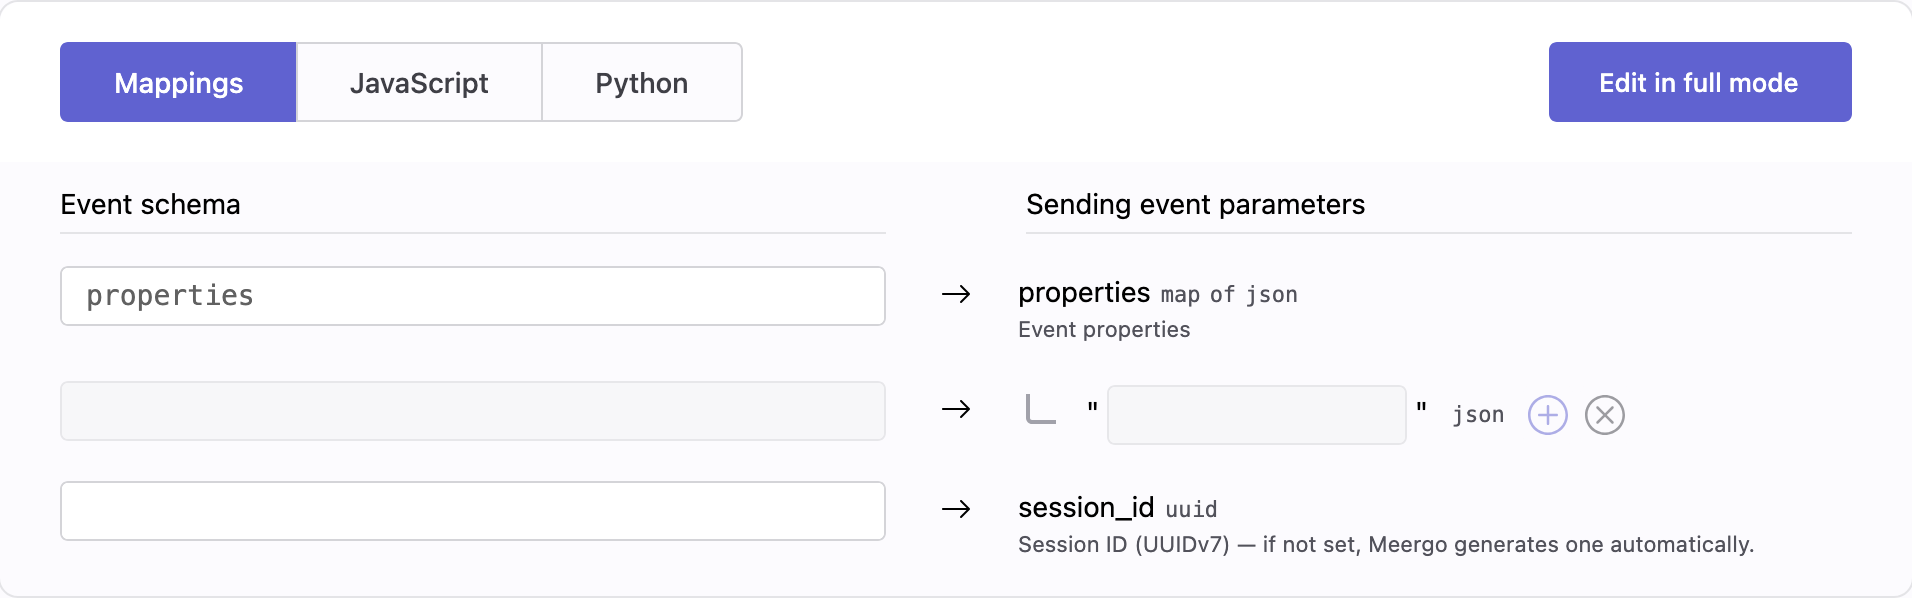
Event properties
The properties parameter represents the event properties sent to PostHog.
What it contains depends on the event type:
- For Pageview or Track events, it includes event-specific properties (for example URL, referrer, product ID, amount).
- For Identify events, it contains user traits (for example email, name, plan, company).
You can map data to the properties parameter in two ways:
-
Map all properties
- Directly map
properties(ortraitsfor Identify events). - All incoming properties or traits are forwarded to PostHog.
- This is the simplest option and works well in most cases.
- Directly map
-
Map individual properties
- Select specific fields from
propertiesortraits. - Useful if you want tighter control over which data is sent.
- Recommended for stable or business-critical analytics.
- Select specific fields from
Choose this based on whether you want speed (map all) or control (map individual properties).
Session ID
In most cases, you can leave session_id unset and use the default behavior.
Only set this parameter if you already manage sessions externally and want to forward that value explicitly. For details, see the Session tracking documentation.
7. Save your changes
When everything looks good, click Add (or Save if you're editing an existing pipeline). The new pipeline will appear in the PostHog connection page.
To send additional events to PostHog, repeat the process starting from the Define a pipeline for each event step.
Pipelines
Once saved, the new pipeline appears in the pipelines list for PostHog. From here, you can monitor deliveries, adjust filters, and event parameters. Each pipeline defines how and when events flow from sources to PostHog.
With a single PostHog connection, you can create multiple event pipelines, each dedicated to a specific event type you want to send.

| Column | Description |
|---|---|
| Pipeline | Name and description of the pipeline. |
| Filters | Conditions used to select which events are sent. If not set, all events are included. |
| Enable | Switch to activate or deactivate the pipeline. When disabled, no events are sent. |
| Manage | Edit settings such as filter and transformation. |
| ⋮ (More) | Additional options, such as deleting the pipeline. |