
Ingest users from files
Learn how to ingest users from files.
 View as Markdown
Krenalis makes it easy to collect user data directly from files, seamlessly map its schema to the Customer Model schema, and load it into your data warehouse for a unified and consistent customer view.
Krenalis currently supports CSV, Excel, JSON, and Parquet file formats. Files can be read from S3, SFTP, and HTTP sources. In a testing environment, it is also possible to read files directly from the local file system.
Steps
1. Connect a storage
To get started, connect to the file storage where your file is located (unless you've already connected it previously, for example when importing another file).
- Go to the Sources page of your Krenalis workspace.
- Click on Add a new source ⊕ and click on the card corresponding to your file storage type (S3, SFTP, or HTTP GET).
- Click on Add source....
Enter the connection details for the storage. You don't need to specify the file name at this step — you'll do that after adding the storage.
S3
| Field | Description |
|---|---|
| Access Key ID | Your AWS access key ID. |
| Secret Access Key | Your AWS secret access key. |
| Region | AWS region where the S3 bucket is located. |
| Bucket name | Name of the S3 bucket that contains the files you wish to read. |
SFTP
| Field | Description |
|---|---|
| Host | Hostname or IP address of the SFTP server. |
| Port | Port number used for the SFTP connection (default is 22). |
| Username | Username for authentication. |
| Password | Password associated with the username. |
| Server public key | Optional server host public key used to verify the server identity before connecting. |
HTTP GET
| Field | Description |
|---|---|
| Host | Hostname or IP address of the HTTP server. |
| Port | Port used to connect (default is 443 for https). |
| Headers | Key/value pairs of HTTP headers to send with the GET request. |
File System
⚠️ File System is for development and testing only. Not recommended for production.
Use this storage for local testing without relying on remote services. To use the File System storage, run Krenalis with Docker Compose or include it in your Krenalis build and set the required environment variables.
| Field | Description |
|---|---|
| Simulate high latency during I/O operations | This setting simulates random I/O latency between 0.3s and 1.3s during I/O operations to test how Krenalis and connected systems behave under slower storage or network conditions. |
Click Add to confirm the configuration. The connection you just created is a source connection. You can access it later by clicking Sources section in the sidebar.
2. Add a pipeline to import user data
In the connection for S3, next to the Import users pipeline, click Add pipeline....

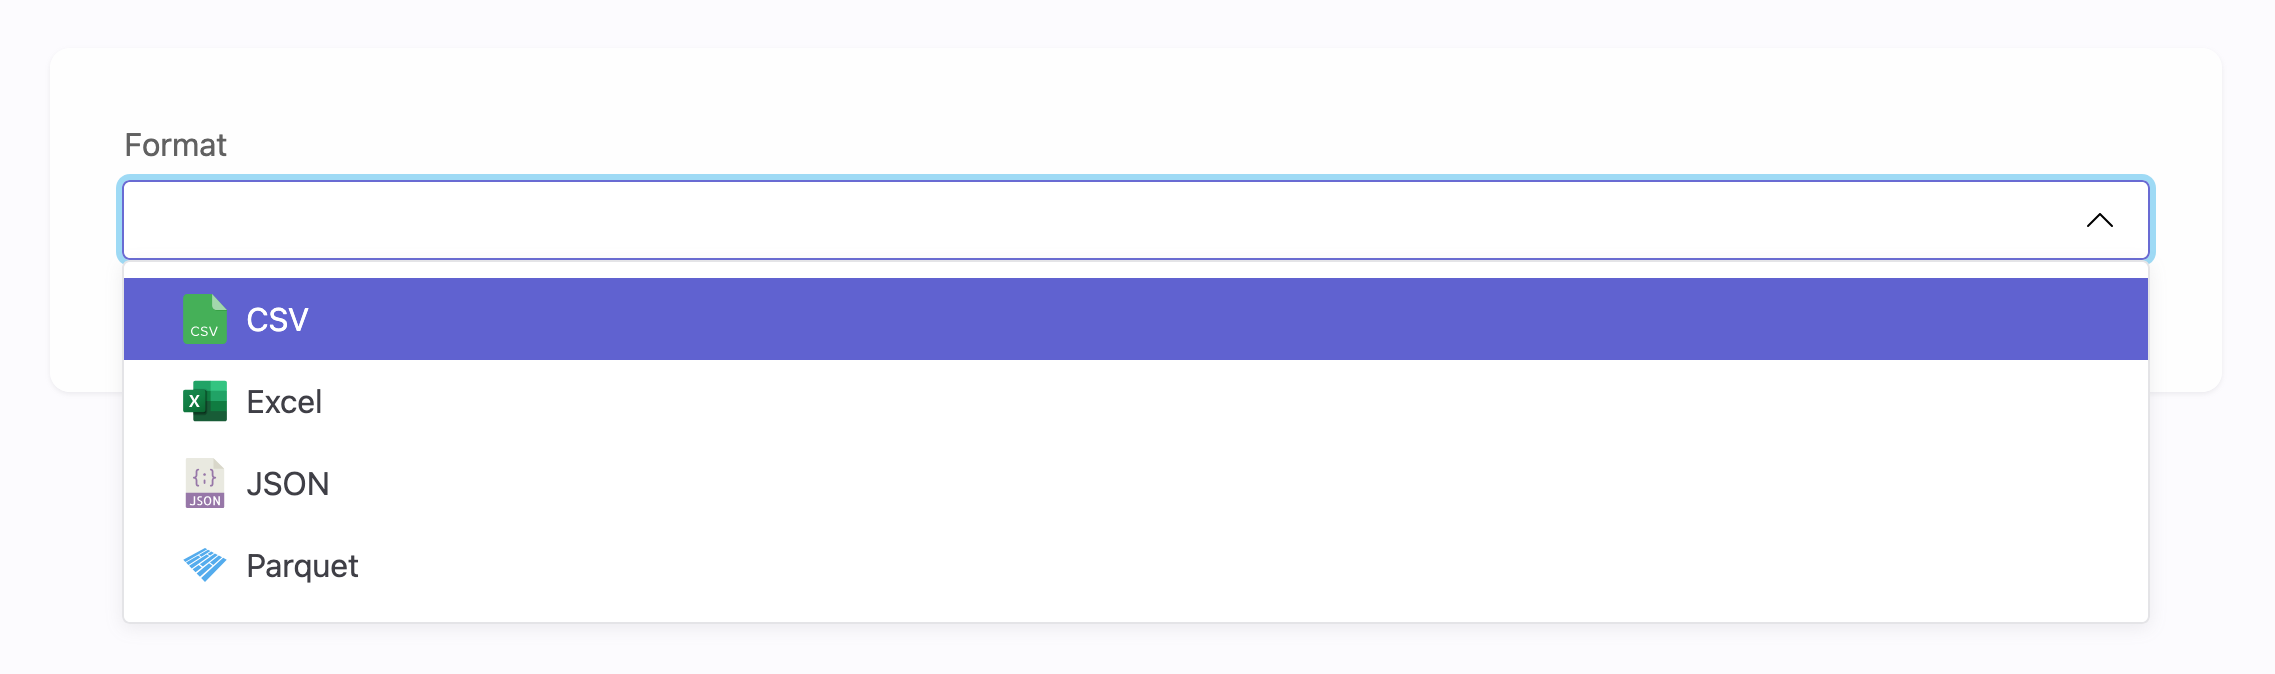
3. Choose a format
Choose the format of the file you want to import. You can change it later if needed.
4. Enter file settings
Fill in the following fields:
CSV
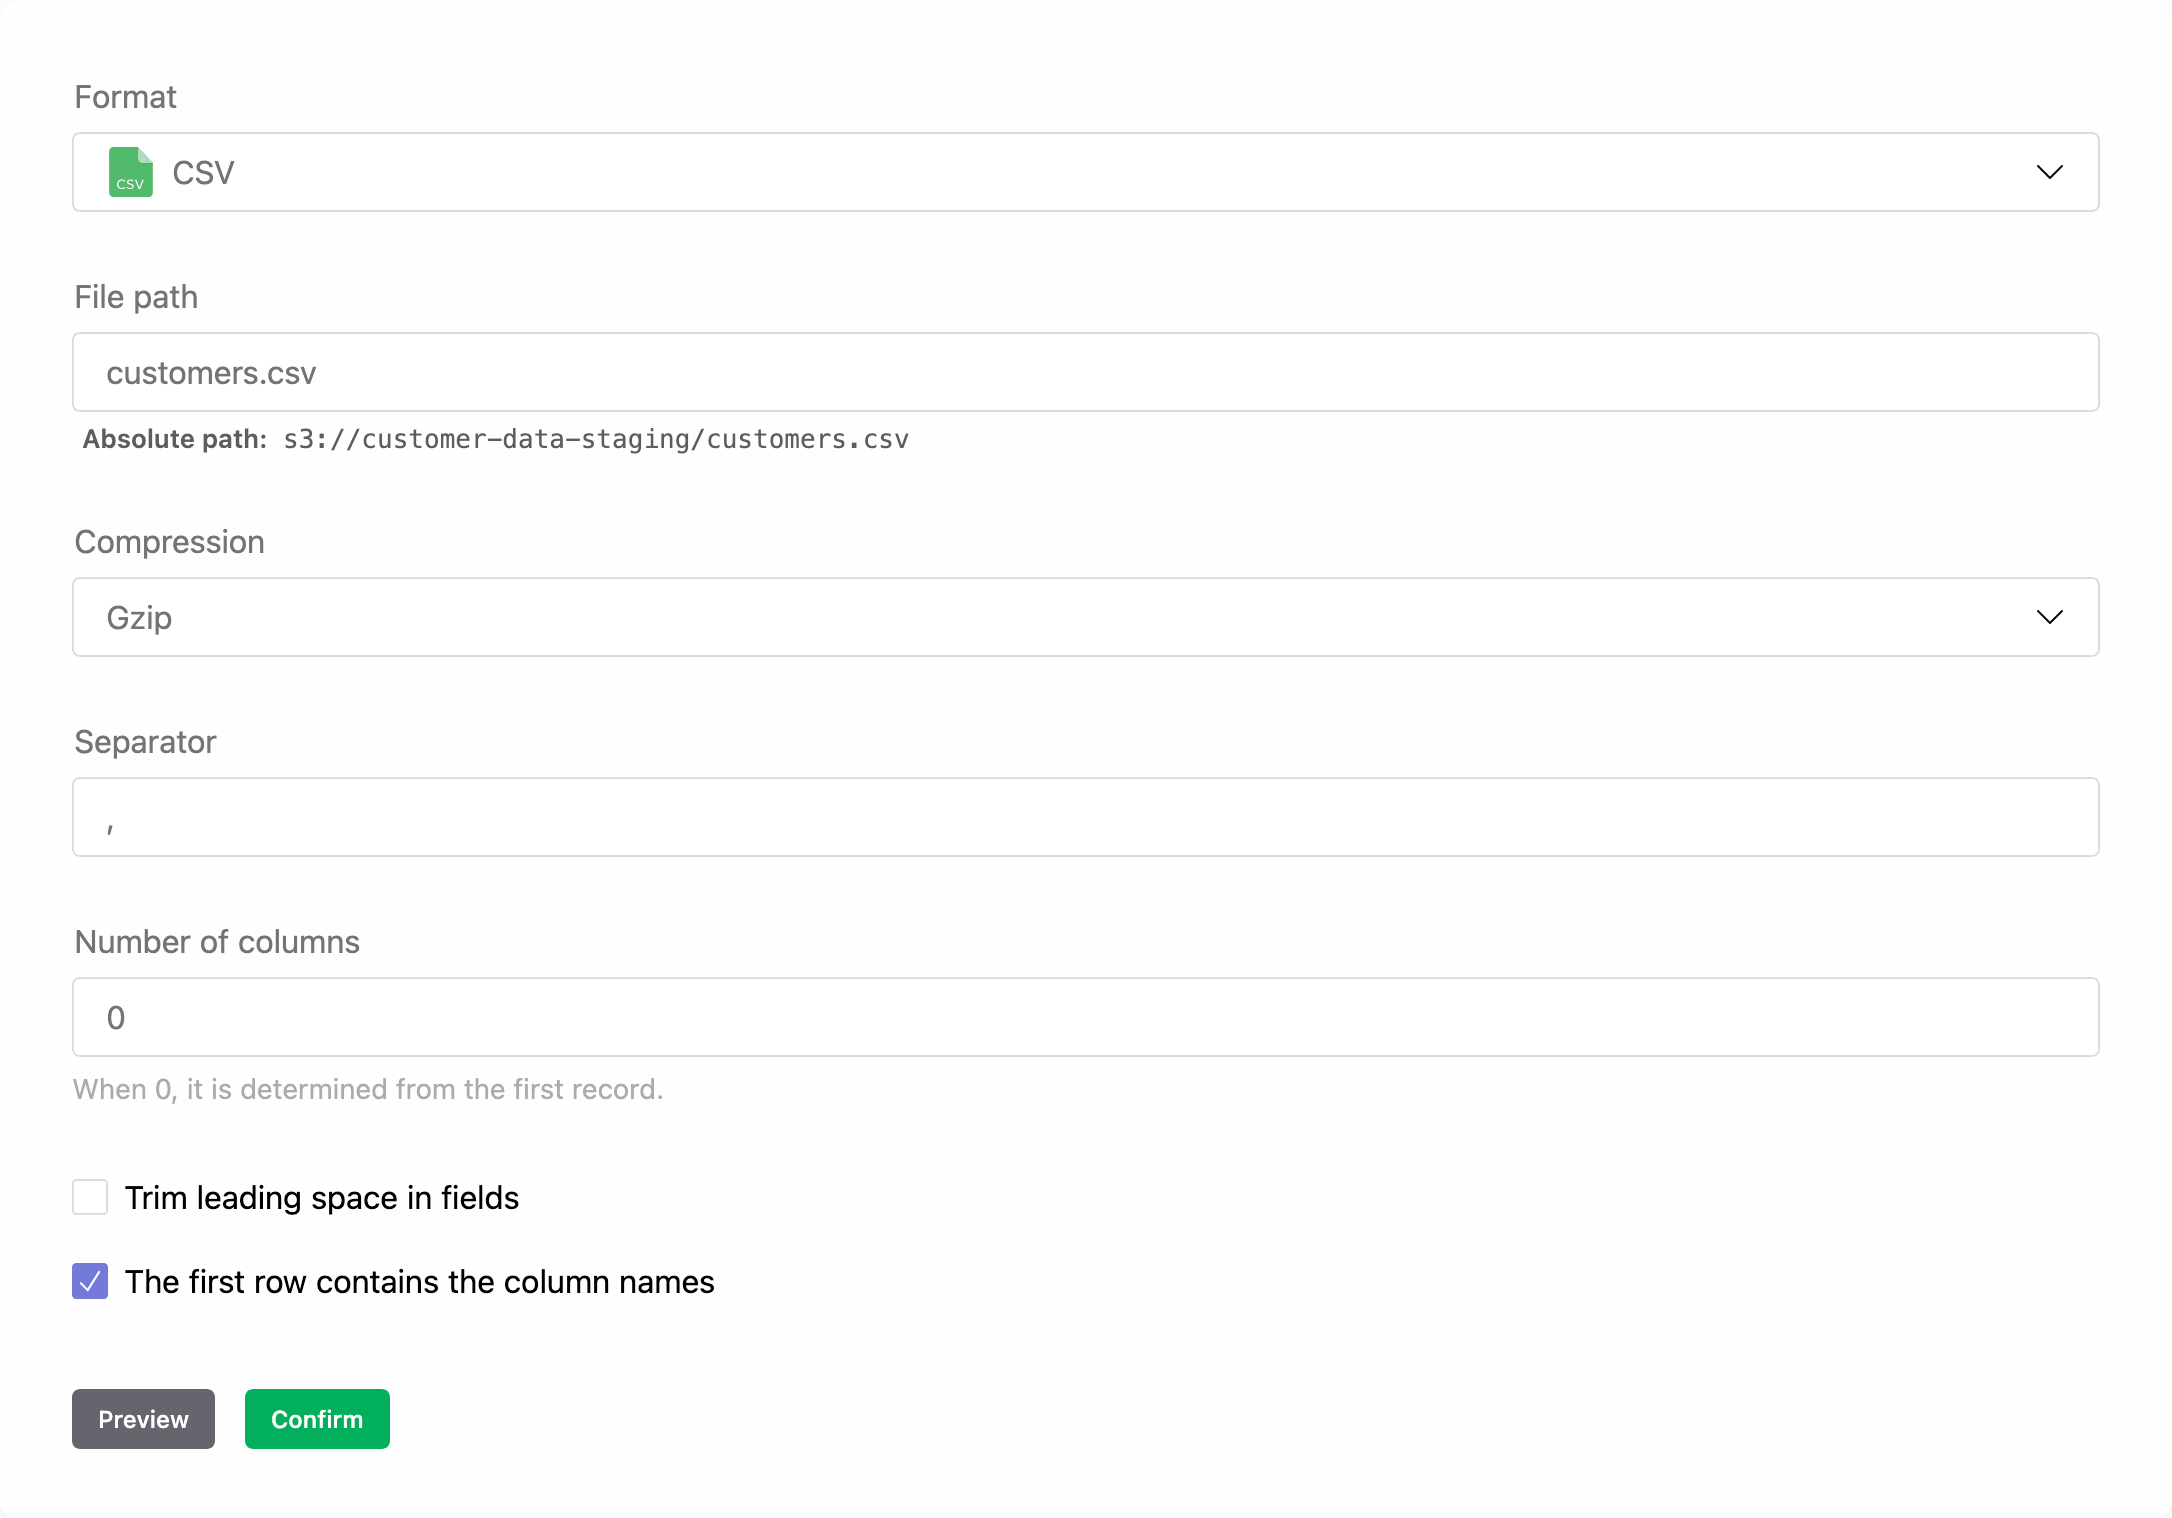
Set the following options for your CSV file:
| Field | Description |
|---|---|
| Path | Path of the CSV file, relative to the storage root path. Note that when you enter the relative path, the absolute path of the file will be displayed, so you can check that the path that you have entered is correct. |
| Compression | Compression format. If the CSV file is compressed, select the compression format; Krenalis automatically decompresses the file upon reading. |
| Separator | Character used to separate fields. By default, this is a comma. Specify another character if different. |
| Number of columns | Expected number of columns. If Number of columns is set to 0, the number of expected columns is taken from the first record. |
| Trim leading space in fields | Indicates whether leading whitespace in a field should be ignored. |
| The first row contains the column names | Indicates if the first row of the CSV file contains the column names. If not selected, the column names will default to A, B, C, etc., similar to Excel files. |
Excel
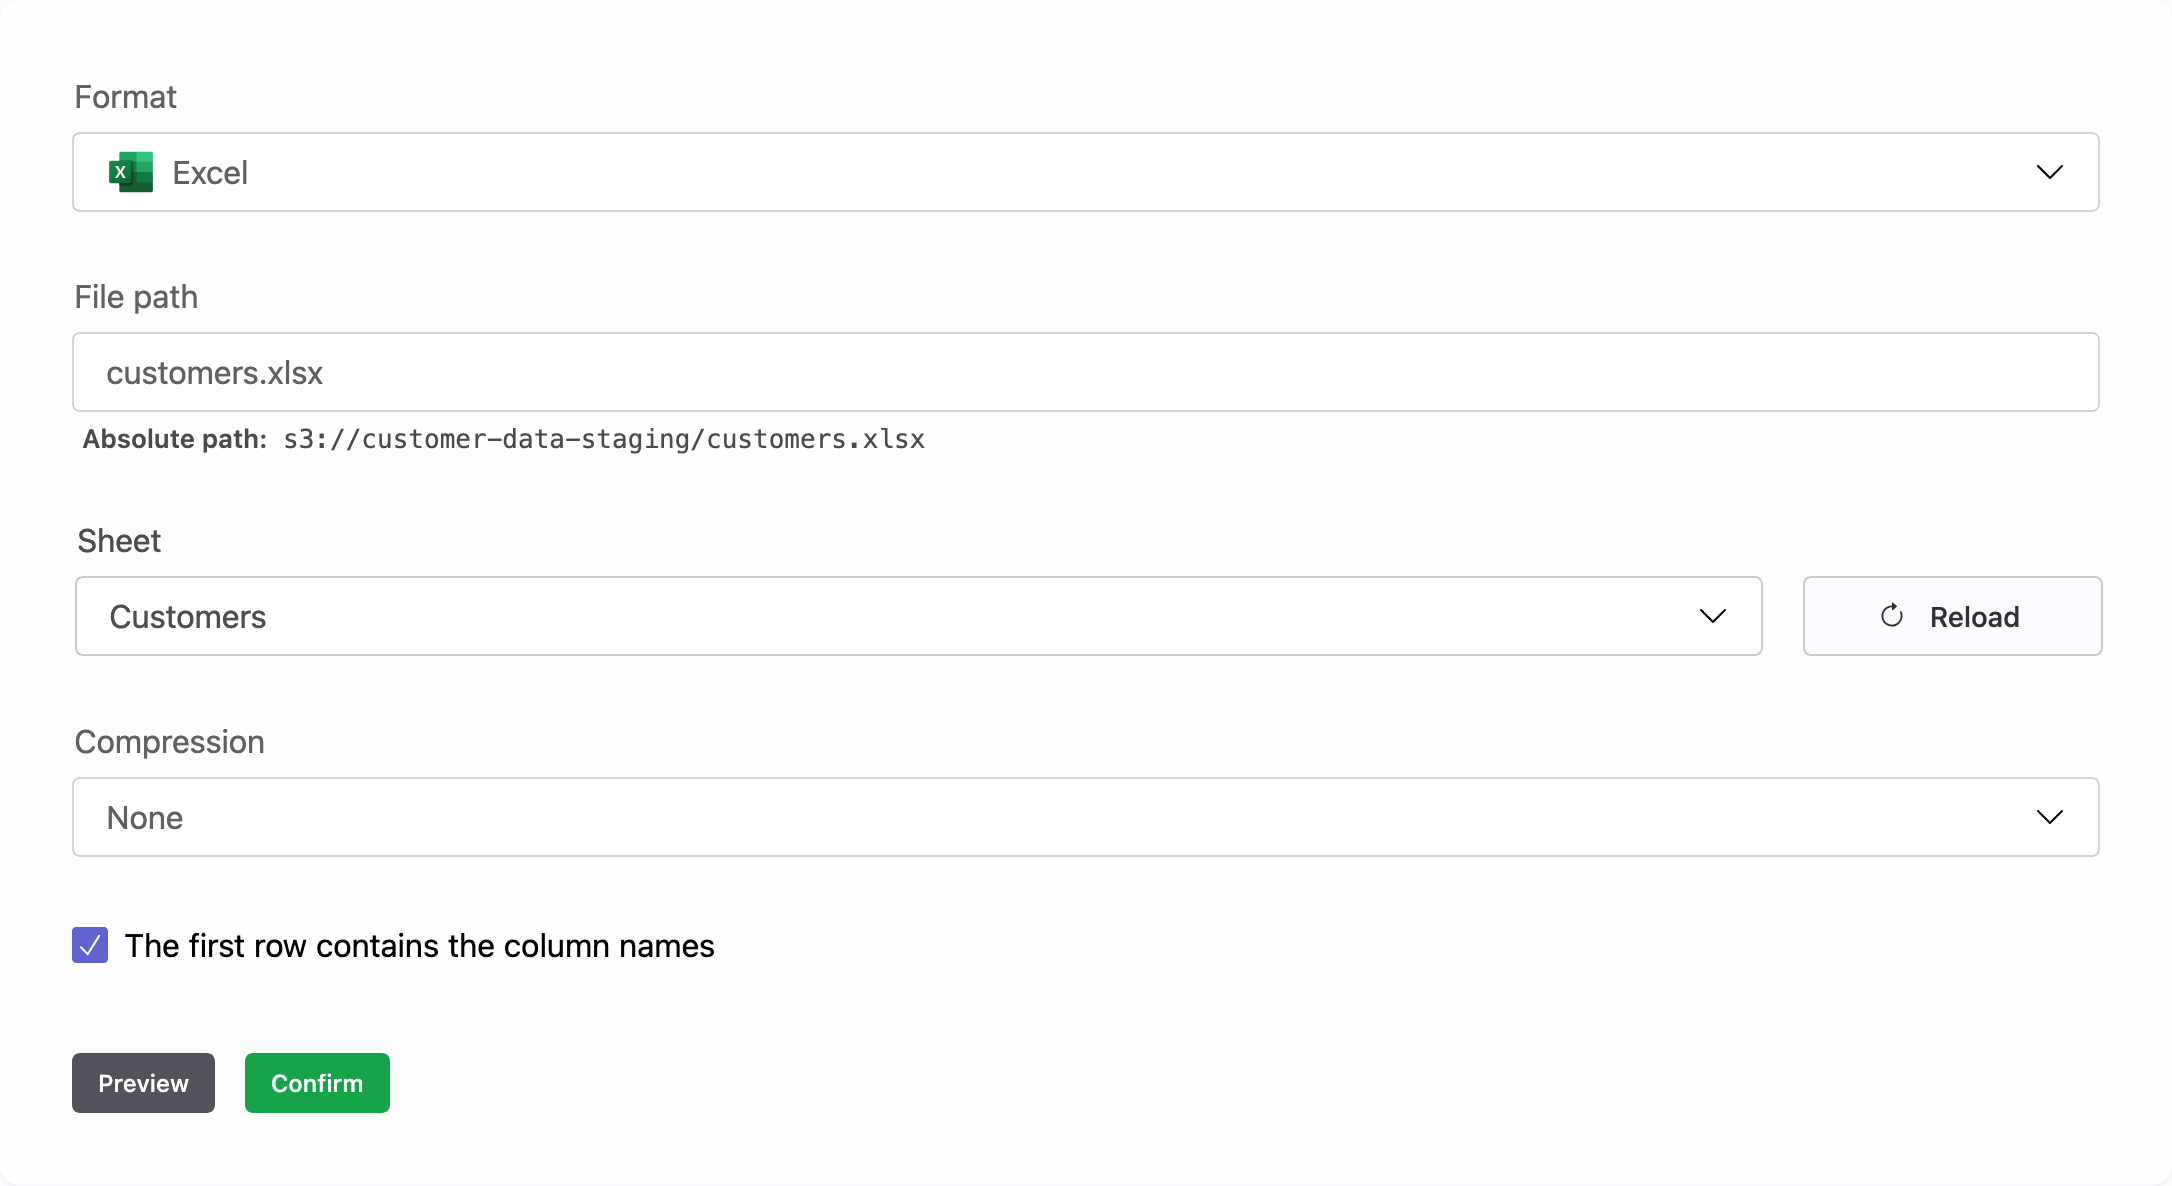
Set the following options for your Excel file:
| Field | Description |
|---|---|
| Path | Path of the Excel file, relative to the storage root path. Note that when you enter the relative path, the absolute path of the file will be displayed, so you can check that the path that you have entered is correct. |
| Sheet | Sheet name from which you want to read the users. |
| Compression | Compression format. Note that the XLSX format is already compressed by design, so select a compression format only if the file has been additionally compressed. Krenalis automatically decompresses the file when reading it. |
| The first row contains the column names | Indicates if the first row of the Excel file contains the column names. If not selected, the column names will default to A, B, C, etc. |
JSON
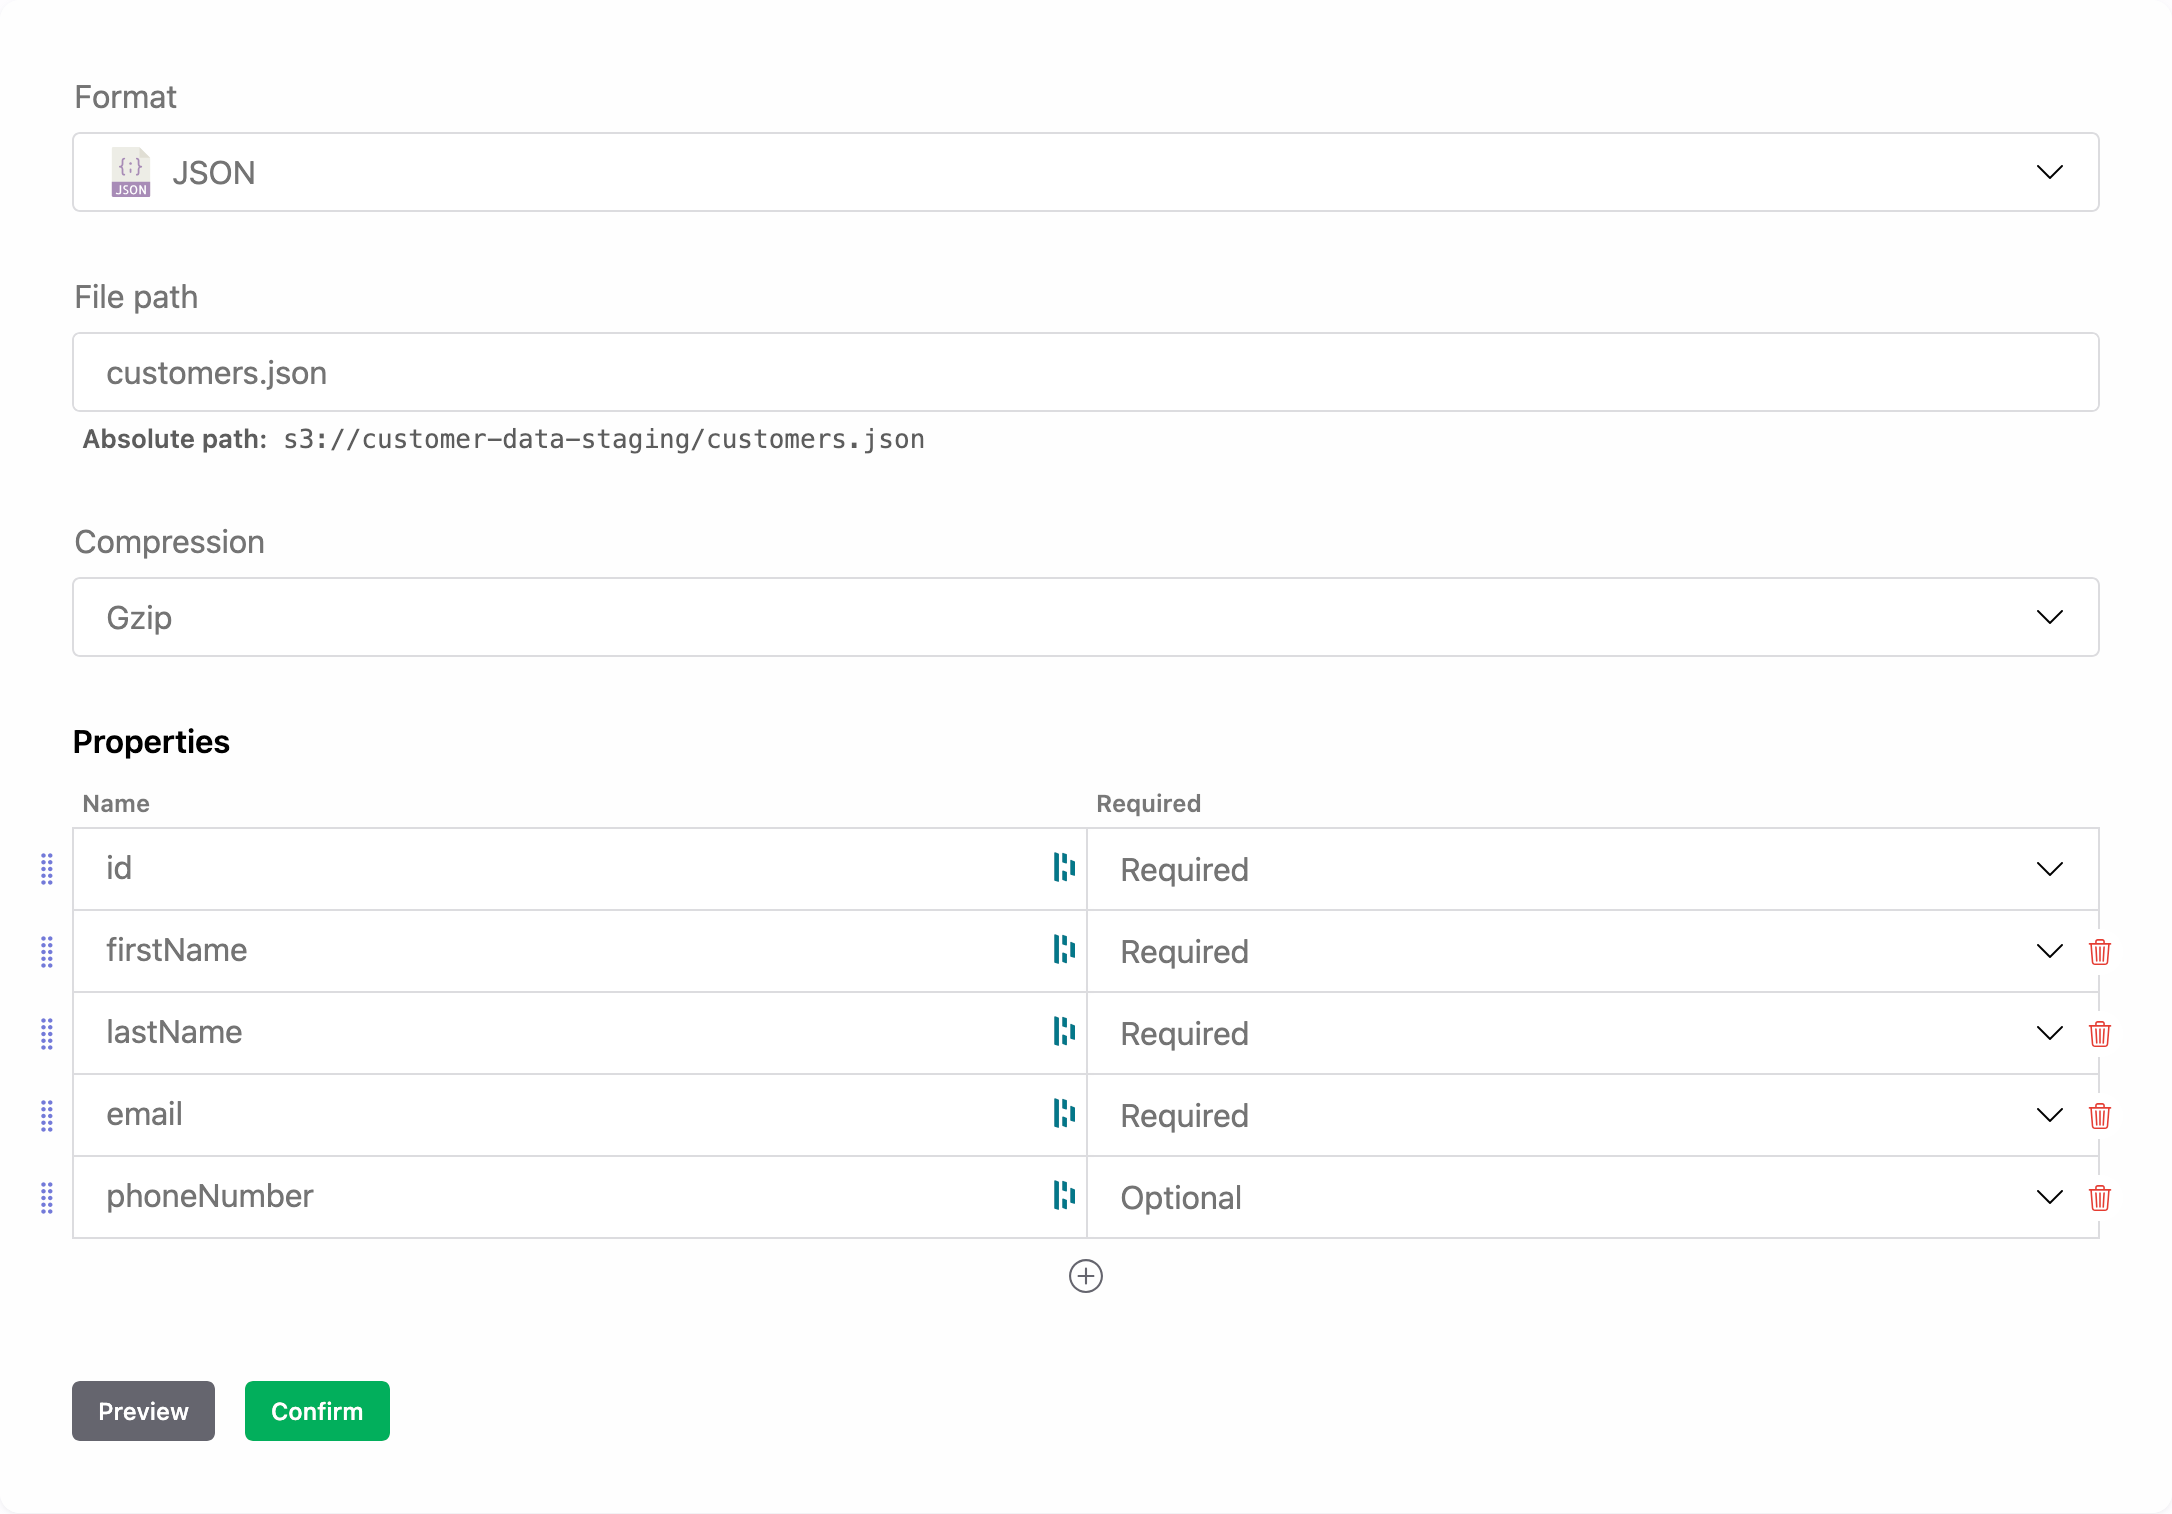
Set the following options for your JSON file:
| Field | Description |
|---|---|
| Path | Path of the JSON file, relative to the storage root path. Note that when you enter the relative path, the absolute path of the file will be displayed, so you can check that the path that you have entered is correct. |
| Compression | Compression format. If the JSON file is compressed, select the compression format; Krenalis automatically decompresses the file upon reading. |
| Properties | Names of the properties to read from the file, and whether each is required or optional. Click ⊕ to add more properties. |
For details on how a JSON file is imported, see Imported JSON format.
Parquet
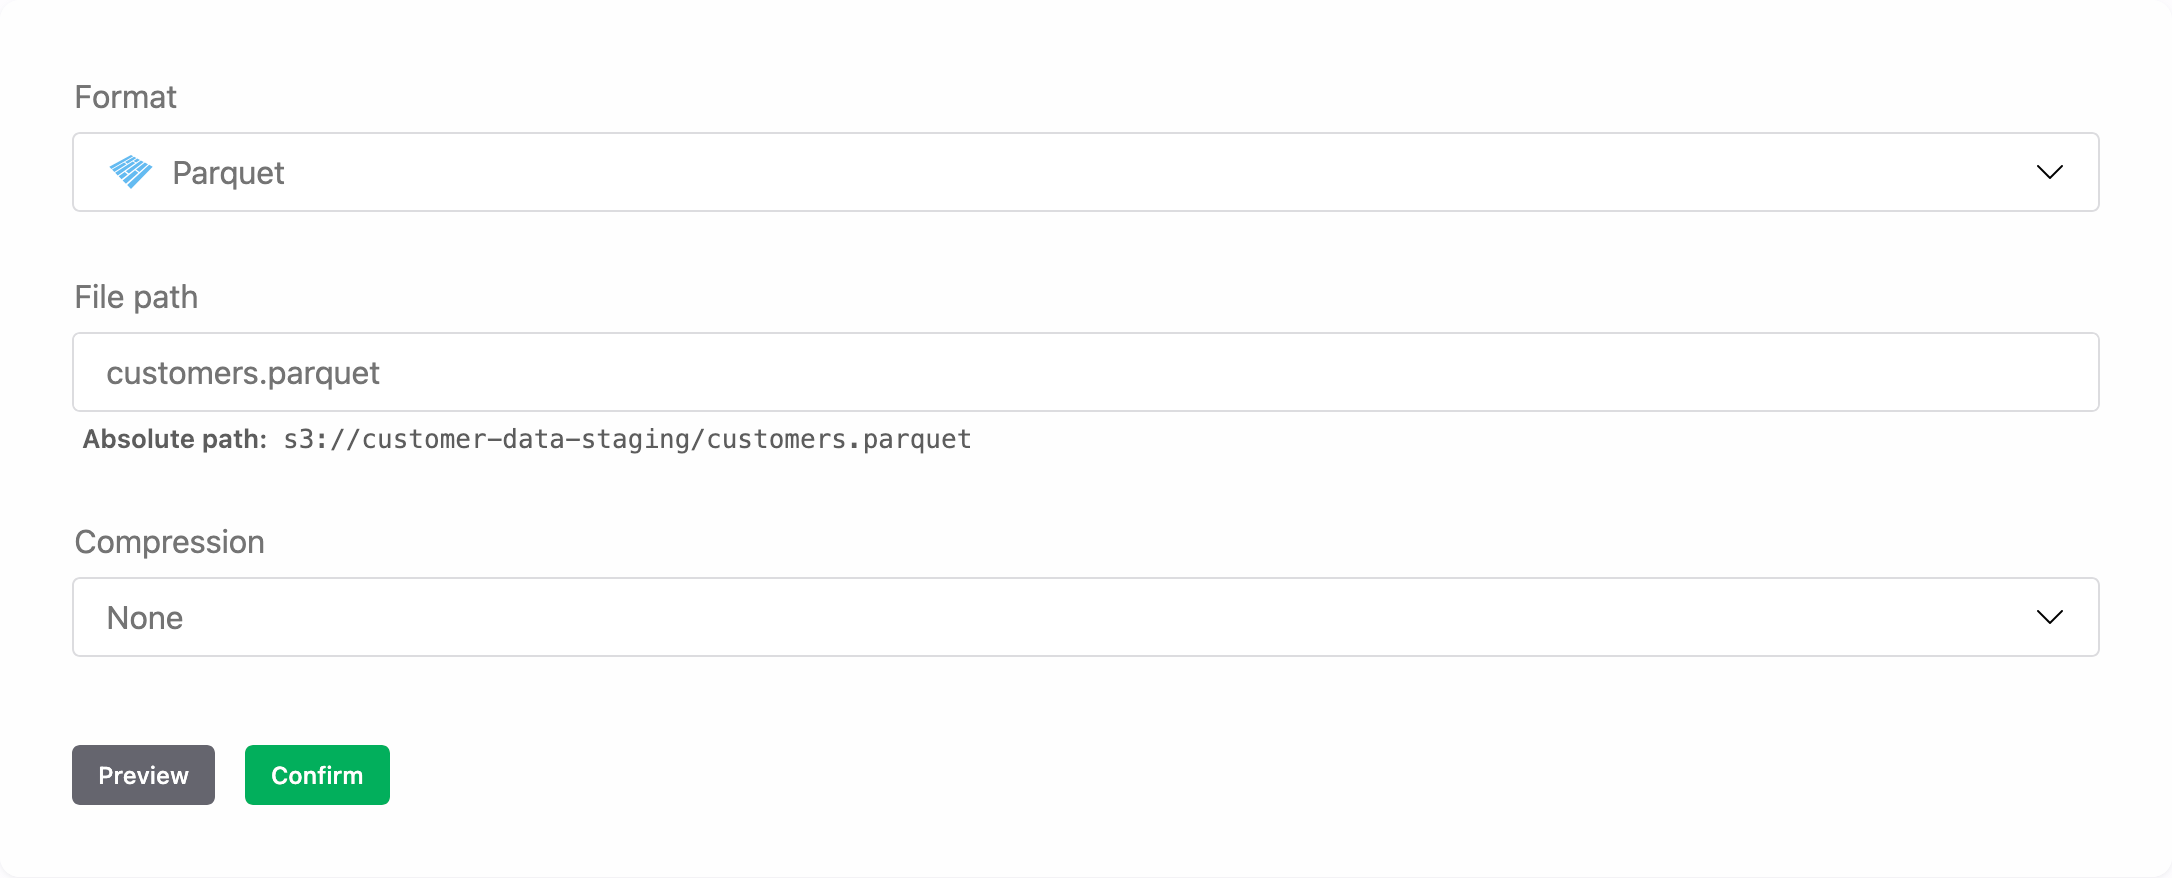
Set the following options for your Parquet file:
| Field | Description |
|---|---|
| Path | Path of the Parquet file, relative to the storage root path. Note that when you enter the relative path, the absolute path of the file will be displayed, so you can check that the path that you have entered is correct. |
| Compression | Compression format. If the Parquet file is compressed, select the compression format; Krenalis automatically decompresses the file upon reading. |
For technical details on how a Parquet file is imported, see How Parquet columns are imported.
Click Preview to show a preview of the file with the first rows.
Click Confirm to apply the settings. You can still modify them later if needed.
5. Filter rows
If you don't want to import all rows from the file, use filters to select which users to import. Only users that match the filter conditions will be imported. If no filters are set, all users in the file will be imported. For more information on how to use filters, see the Filters documentation.

6. Identity column
Select the column that uniquely identify each user in the file, and if available, the column that contains the user's update time. For this column, you can use the ISO 8601 format, a custom date format, or, for Excel files only, the native Excel date format.
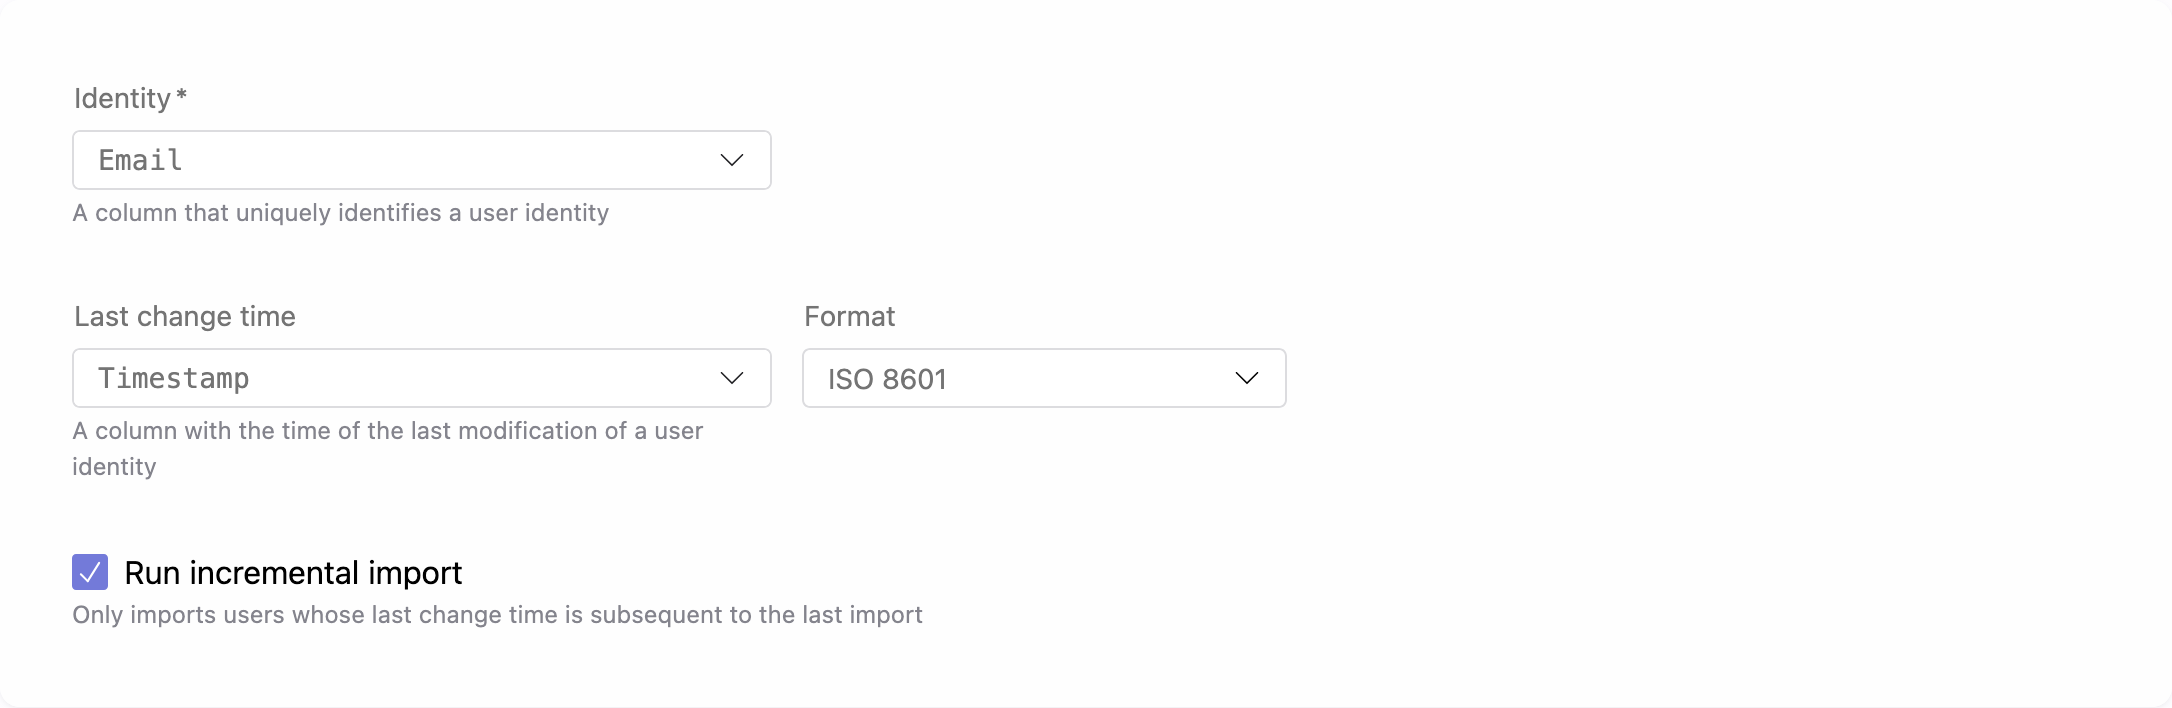
Select Run incremental import if you want subsequent imports to include only the rows updated after the last import.
7. Transformation
The Transformation section allows you to harmonize the file schema with your Customer Model schema. You can choose between Visual Mapping or advanced transformations using JavaScript or Python.
Its purpose is to assign values from the file to the properties of the Customer Model. You have full control over which properties to map, assigning only those that matter to your business context while leaving others unassigned when no corresponding values exist.
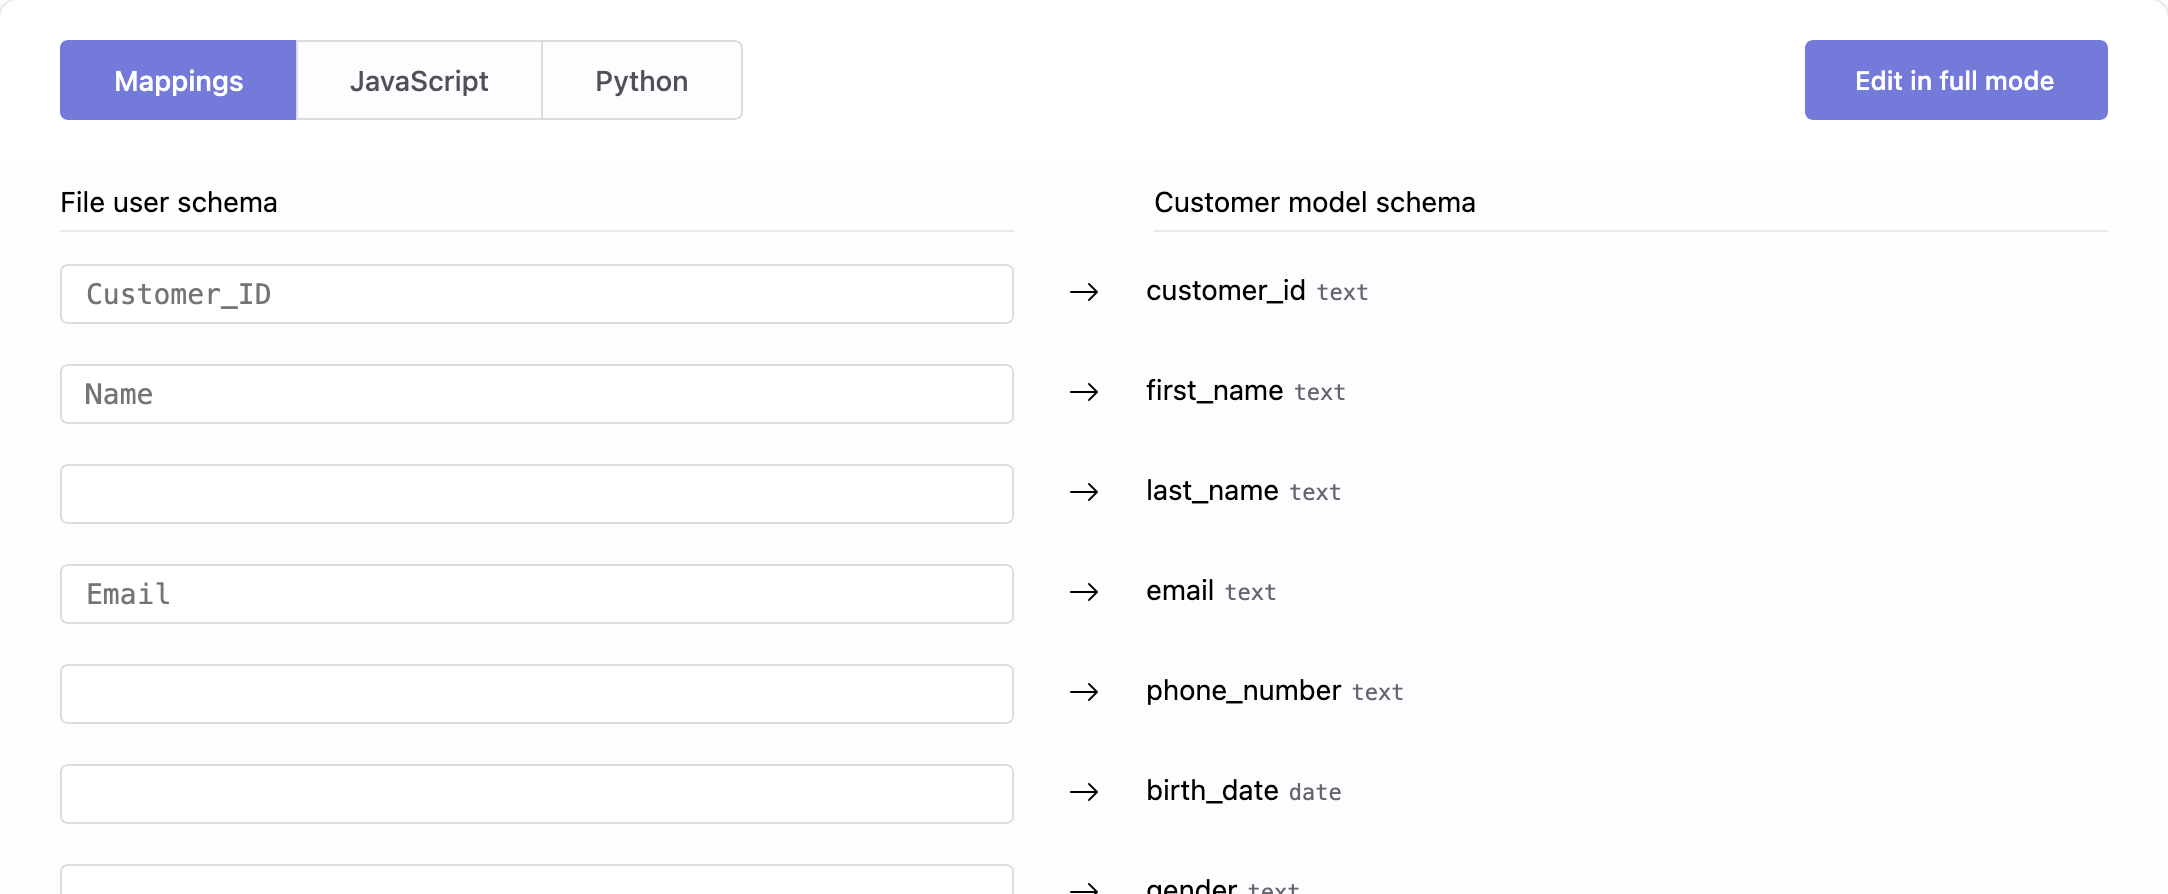
For complete details on how transformations work for harmonization, see how to harmonize data.
8. Save your changes
When you're done, click Add (or Save if you're editing an existing pipeline).
For a single storage connection, you can also create multiple pipelines to import different files from that storage, each with its own set of users.
Pipelines
Once saved, the new pipeline appears in the pipelines list for S3. From here, you can monitor imports, adjust filters, and manage transformations. Each pipeline defines how and when users flow from S3 into your warehouse.
For a single S3 connection, you can also create multiple pipelines to import different files.

| Column | Description |
|---|---|
| Pipeline | Name and description of the pipeline. |
| Filters | Conditions used to select which users are imported. If not set, all users are imported. |
| Enable | Switch to activate or deactivate the pipeline. When disabled, the pipeline will not run, even if a schedule is defined. |
| Run now | Run the import immediately, one time only. Available only when the pipeline is enabled. |
| Schedule | Frequency of automatic imports. You can also run the import manually at any time. |
| Manage | Edit settings such as filter, identity column, and transformation. |
| ⋮ (More) | Additional options, such as deleting the pipeline. |